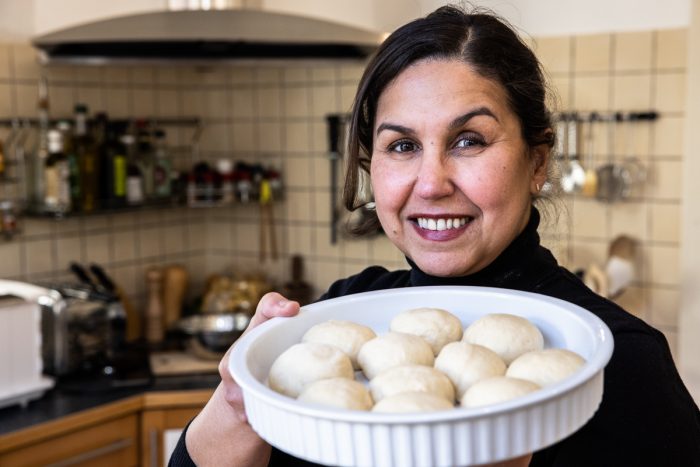
Fluffy, irresistible, easy to make and with natural yeast. These are the milk buns made with levain that will be the biggest hit in your house.
When talking about natural yeast, many people think only of rustic bread. But you can make a multitude of recipes with natural baking soda. Now, I warn you: once you make these buns, it's going to be hard to want to do anything else. They are super soft, with a sweet flavor and best of all, you don't need to cool them down to eat them. They are tastier if served warm.
Ingredients
| amount | ingredient |
| 500g | wheat flour |
| 100g | levain |
| 290g | milk |
| 30g | water |
| 10g | salt |
| 45g | sugar |
| 35g | butter |
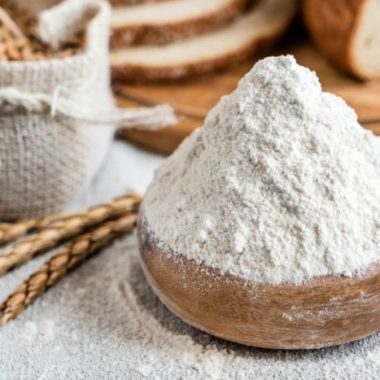
Flour: I used a wheat flour with 10.6% of protein. You can use stronger flour or flour with a higher protein content. But you will have a less soft bread.
Levain: I used 40g of my natural yeast Goshi and added 40g of water and 40g of flour (90% white flour and 10%) rye flour
Milk: Whole milk results in a richer dough. If you prefer a vegan option, you can substitute oat milk or something similar.
Sugar: I used refined sugar. You can use another of your choice, but this may change the color in the case of unrefined sugar. You can also decrease the amount, but the taste will change. These are breads that have a sweeter taste.
Butter: butter can be replaced with a vegetable option. Of course the taste changes a little
Utensils and Equipment
Will be needed:
- Bowl or Bowl
- A spatula or danish whisk
- A baker's spatula
- digital scale
- Brush
- Gloves
In a mixer or by hand?
I chose to do it by hand. First, because I like to feel the dough developing. Also because not everyone has a mixer at home capable of mixing bread dough. So I thought it interesting to show this option. To make it in a mixer, mix all the ingredients, beat until you reach the veil point and complete the fermentation. It's your choice.

Where to bake?
For this type of bread, I like to use a heatproof bowl. But nothing prevents you from using a metal roasting pan. If you choose the metal baking sheet, grease it with flour and butter or use non-stick paper. Another option is a muffin tin, but grease it very well. Caution: metal utensils cook faster.
Planning
I usually prefer to make and bake it the next day, but it's also very good baked the same day. But be careful, the scheme below may vary depending on the temperature of your kitchen. In hotter kitchens, fermentation will occur more quickly.
| Baking on the same day | Baking the next day |
| 20:00 Take the levain the night before | 8:00 am Make the levain |
| 8:00h Melt the butter with milk, sugar, water and salt | 13:00h Melt the butter with the milk, sugar, water and salt. |
| 8:30h Mix all ingredients | 13:30h Mix all ingredients |
| 9:30h Make 1st fold | 2:30 p.m. Make 1st fold |
| 10:00h Make 2nd fold | 3:00 p.m. Make 2nd fold |
| 10:30h Make 3rd fold | 3:30 p.m. Make 3rd fold |
| 12:30h Divide and shape the dough | 17:30h Divide and shape the dough and put it in the fridge |
| 4:00 pm Bake | 8:00h Take the buns out of the fridge and let them rise at room temperature |
| 11:00h Bake |
Success factors
- Active Levain: your levain should be at peak. It should be bubbly and at least doubled in volume.
- Kitchen temperature: Knowing your kitchen temperature is essential when making bread. The temperature in my kitchen is around 20°C to 21°C. If your kitchen is warmer, you should reduce fermentation times.
- Where to bake: an ovenproof dish will give you softer buns than a metal pan. Baking time for a metal baking sheet should also be reduced.
- Don't look at the clock. The dough will tell you when it is ready to be molded and/or baked. Therefore, take these schemes as a reference and adapt them to your kitchen environment.

How to store and freeze
These buns are made to be served warm. But if you manage to save any, store them wrapped in a kitchen towel or bread bag for up to 3 days. But I prefer to freeze.
And how to freeze?
Place the rolls, already cold, in a freezer bag, close well and place in the freezer. Important: freeze the already baked buns. They can be frozen for up to 3 months,
How to thaw?

Remove them from the freezer, let the rolls thaw at room temperature, wrap them in aluminum foil and warm them in the oven.
Natural fermentation milk buns
Difficulty: Easy12
units25
minutes25
minutes9-10 hours
Fluffy buns made with natural yeast that will melt in your mouth.
Ingredients
- Levain
40g yeast
40g of water
40g of flour
- Pasta
100g of active levain
500g wheat flour
290g of milk
30g of water
10g of salt
45g of sugar
35g of butter
Melted butter for brushing optional
Way of doing
- Levain: Faça o levain, misturando uma parte do fermento, água e farinha. O levain leva várias horas para ficar pronto. Por isso, se planeje bem. Verifique os esquemas acima.
- Derreta a manteiga, no leite, juntando o açúcar, a água e o sal. Transfira mistura para a tigela que você vai usar e deixe esfriar em temperatura ambiente.
- Adicione a farinha e o levain ativo até todos os ingredientes estarem incorporados. Cubra e deixe repousar por uma hora em temperatura ambiente.
- Do 3 series of folds (strecht & fold) with intervals of 30 minutes between each series. Always covering the bowl at intervals.
How to make the fold
Take the dough from one side and stretch it upwards and fold it in on itself. Turn the bowl a quarter turn and repeat the same process until you have turned the bowl one full turn. After 3 rounds, check the veil stitch. If the dough has reached the veil point, cover and let the dough rest for 2 hours or until it has risen to half size.
Important: fermentation time will depend on the temperature of your kitchen.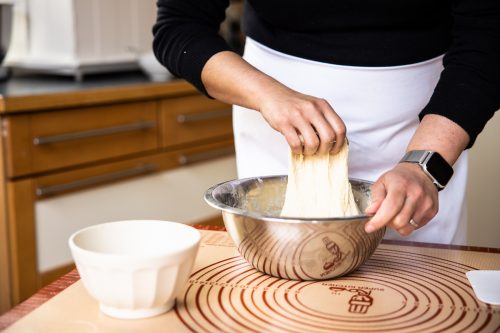
- Modeling: When the fermentation is complete, divide the dough into equal parts (balls) of 80g and shape the breads.
how to model
Join all sides, bringing to the middle of the ball. Turn the dough over so that the place where all the sides meet is facing down. Cup your hand in circular motions on the work surface and gently form a smooth ball. Place the buns in a well-greased baking dish. Cover with a tea towel and let it rest for 3 to 4 hours. You can make any size you want, but I recommend making the same sizes. This way, they will bake evenly.
* Read the notes below - Baking the buns: preheat the oven to 190C. Put the refractory in the oven for 25 to 20 minutes or until the buns are lightly golden. Take the refractory out of the oven, brush the bread with melted butter (optional) to shine the crust. Transfer the buns to a wire rack to cool for 15 minutes and serve while still warm.
Notes
- The temperature in your kitchen will greatly influence fermentation time. The times described in the recipe were measured in an environment of 21C.
- To bake the next day, after shaping the loaves, cover the bowl with plastic wrap and refrigerate for up to 36 hours. But be careful: they will have to stay at room temperature until they grow again. This should last 3-4 hours, depending on the temperature in your kitchen. Only then can they be roasted!





Que maravilha vc mulher. Que aula maravilhosa, DEUS ABENÇOE vc. Amei suas receitas.
Que maravilha de aula vc explica MUITO bem . Que aula maravilhosa, DEUS ABENÇOE vc. Amei suas receitas.
Olá Janete, que bom que você gostou! Muito obrigada pelo comentário. Depois em conta se fez os pãezinhos!
Pão fácil de fazer e fica uma delícia
Olá Ana Maria, obrigada por retornar para me contar como ficou!
Amei a receita, grata
Olá Ana Maria que bom que gostou! Logo, logo tem mais receitas.
Adorei a receita, estou preparando os meus que vão fermentar na geladeira. O cheirinho de manteiga com leite divino, esperando ansiosamente para experimentar.
Que bom que gostou da receita! depois me mostra como ficou 🙂
Estou com uma dúvida, devido a não ter experiência: em que momento devo colocar os 30 gramas de água? Grata.
Olá Bel, pode colocar junto com o leite. Volte sempre!
Oi Bel, no passo 2 da receita. Junto com a manteiga, o leite, o sale açúcar. Depois me fala se deu certo.